Vinyl Installation Guide
Storage
Store unapplied graphics in a clean, dry, cool room. Never subject the graphics material to moisture, excessive humidity, direct sunlight or temperatures above 100 degrees. Graphics should also be stored flat.
Tools Needed
- Plastic Squeegee, credit card or driver's license.
- Tape Measure or Ruler
- Masking Tape (1" or wider)
- Marking Pen or Pencil
- Lint-free paper towels
- Plastic Spray Bottle
- Surface Cleaner (409, Windex, Soap & Water)
Surface Preparation
Before installing any graphics, you must clean the surface on which the decal will be applied to. Using a soft cloth, wash the surface thoroughly. Residual grease, soot or tar should be further cleaned with a solvent. Be sure to clean the surface several times if it was extremely dirty when you started. To avoid adhesion problems, be sure that all liquid has completely dried from under vehicle panel seams and around rivet heads.
The surface you are applying the decals to MUST be in a 60 to 85 degree Fahrenheit environment. If it is too cold the adhesive will not work. If it is too hot the vinyl becomes extremely flexible which makes it very difficult and at times, impossible to apply.
Installation Procedures
Before installing any graphics, you must clean the surface on which the decal will be applied to. Using a soft cloth, wash the surface thoroughly. Residual grease, soot or tar should be further cleaned with a solvent. Be sure to clean the surface several times if it was extremely dirty when you started. To avoid adhesion problems, be sure that all liquid has completely dried from under vehicle panel seams and around rivet heads.
The surface you are applying the decals to MUST be in a 60 to 85 degree Fahrenheit environment. If it is too cold the adhesive will not work. If it is too hot the vinyl becomes extremely flexible which makes it very difficult and at times, impossible to apply.
1. Carefully study your installation diagram. Measure the location of each graphic element and tape it into position. Taking this step will ensure that all of the elements fit properly within the design space.
In planning the installation sequence of the graphic elements, you will usually work from top to bottom.
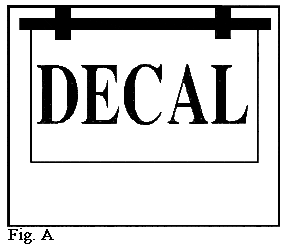
2. Tape the graphic into position with small pieces of masking tape positioned at the top of the graphic. After rechecking your measurements, simply apply masking tape along the top edge of the graphic. (See fig. A.) With this method you can remove the backing gradually as you apply the graphic.
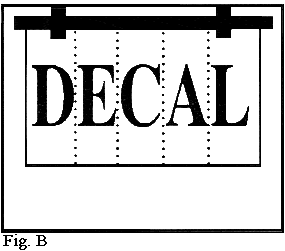
In a variation of the top hinge technique, you can cut between large individual letters or between sections of your graphic so that each letter or section is independently hinged. (See fig B.) Remove the sections of backing and install letter by letter or section by section.
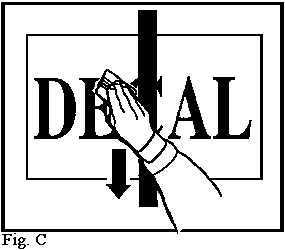
To make a center hinge, apply masking tape through the middle of the graphic. (See fig C.)
Using this technique, remove the backing from one half of the graphic, cutting the backing at the tape hinge. After you squeegee this section of the graphic, working from the hinge to the outer edge, remove the hinge and the remaining backing. Compete the application, starting where the hinge used to be and working toward the other outer edge.
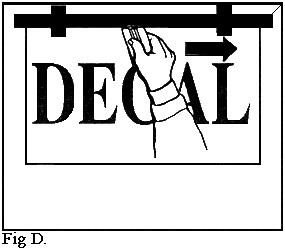
3. Typically your first squeegee stroke begins at the center of a graphic. This first movement is straight to the left and right or up and down, depending on which procedure you decided to use. (See fig D.)
All of your subsequent strokes work off the initial center stroke. Each stroke must overlap the previous one. You can angle your squeegee slightly away from the center line. Imagine that you are pushing air out from under the vinyl. Never angle the squeegee toward the center line...you will only produce bubbles and wrinkles. Always work from the center outward.
4. If you need to reposition the vinyl graphic on the surface give the material a sharp jerk with a snap of your wrist. This movement should be perpendicular to the surface.
Never use a slow pulling movement to reposition the graphic. This will only stretch the material causing more problems.
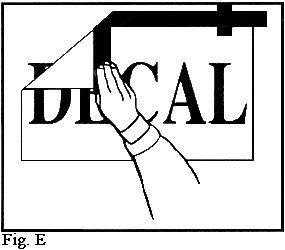
5. To remove the application tape from the graphic, pull the tape against itself at a 180-degree angle. (See fig E.) Do this slowly.
If the graphic does not stick to the surface (it stays stuck to the application tape) carefully place the graphic back onto the surface and squeegee again. After removing the application tape, be sure to re-squeegee all of your edges and overlaps. Using your finger or thumb works best for this.
